I’ve waited over a month to share our terrarium project here on the blog. Do you want to know why? I wanted to make sure little plant world survived before I wrote about how we created it!
First off, what exactly IS a terrarium? For our purposes, a terrarium is an enclosed (covered) clear glass vessel containing living plants. Creating a terrarium is a great way to teach kids about the water cycle, and it’s a low maintenance way to add a little life into your home! It’s also very easy to make & once supplies are gathered will just take 30 minutes or so!
In theory, if created properly, a covered terrarium doesn’t require a lot of upkeep. Once watered, the container produces it’s own little ecosystem. The soil releases water vapor, which collects on the sides of vessel, trickles down back into the soil, and the process starts over again! The only other requirement is to place the terrarium near sunlight. We’ve placed ours by our large front bay window, and it seems quite “happy” there!
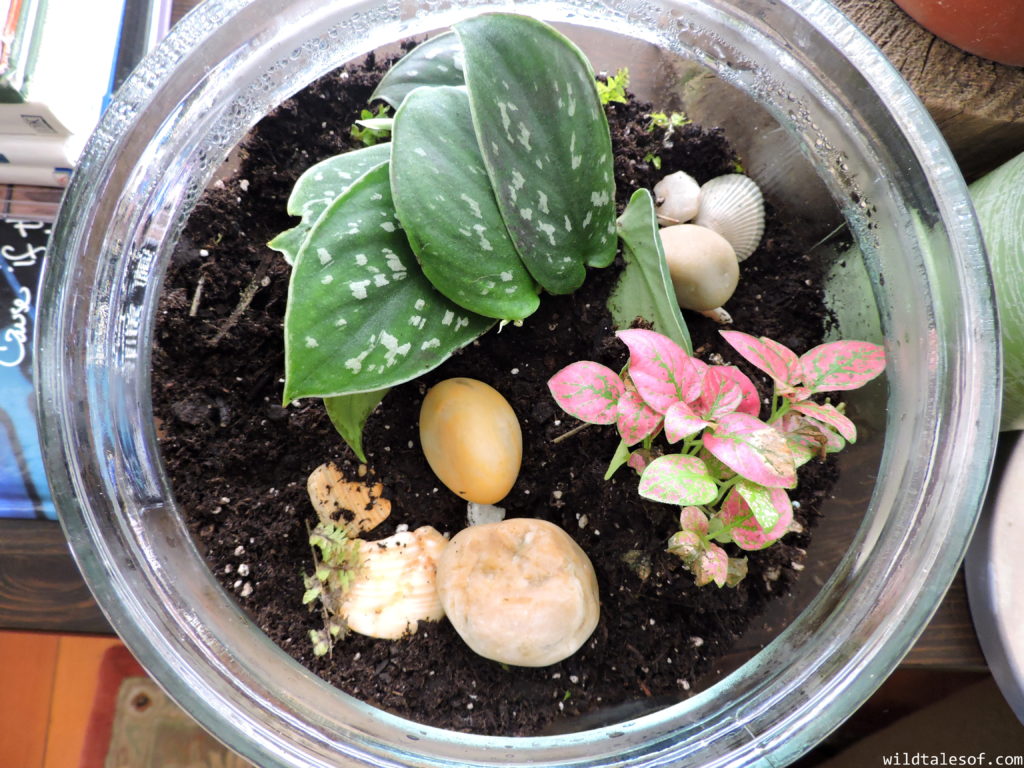
How a Make a Terrarium
Here’s how we created our terrarium, step-by-step. Inspiration (and information) for this terrarium project came from these two books: Playful Learning by Mariah Bruehl and 101 Things for Kids to Do on a Rainy Day by Dawn Isaac.
Supplies:
- Clear glass container with airtight cover
- Pebbles
- Activated Charcoal
- Soil
- Small plants
- Treasures (rocks, shells, etc) to decorate
1. Layer the bottom of your glass container with pebbles.
We found our container at our local Goodwill (I believe it’s originally from Ikea). We were able to scrounge up pebbles in our backyard, but they are also available at garden stores and online.
2. Sprinkle a layer of activated charcoal.
It took some searching (and understanding) to find activated charcoal. It’s also known as activated carbon, and is a way of filtering out odor and pulls out toxins–something very important for an enclosed terrarium! You only need to sprinkle a layer, so buy the smallest amount you can find. It’s also what’s inside many water filters, so if you have extra one, just open it up & use that!
3. Add soil
We used a simple potting soil mixture. I read in Playful Learning that if you want to add animals (worms, insects, etc) at some point, you’ll want soil from the backyard as those creatures don’t do well in potting soil.
4. Insert plants
We read that African Violets and Ferns do well in terrariums. Plants that like humidity are good choices, and just make sure your plants are small enough to fit in your container!
5. Arrange treasures to decorate!
Bergen has a small treasure box that he uses to house all of the treasures he finds on walks, hikes, and through our travels. Decorating the terrarium with a few of these treasures was a great way to put them to good use! After a few days, I noticed some of the treasures started to grow mold, so just make sure to check on them. Rocks and shells have been fine, but nut shells were not!
6. Spray with water, and close.
We sprayed just enough to moisten the soil well, and I make sure to monitor the terrarium for moisture. I suspect that at some point we’ll probably need to add some water, but it’s been over a month and we haven’t needed to yet! The type of climate you live in will also effect the life of your terrarium.
Do you have house plants? Ever created a terrarium for your home? I’d love to hear about. Let’s chat in the comments.
Affiliate links are used in this post to point you toward materials we used to complete this project. If you purchase through our special links, we’ll receive a small commission that goes toward keeping the blog running. Thanks for considering!
 DIY Valentine’s Day Gifts for Kids | Easy Nature Crafts
 Rainy Weather Halloween Costume Idea: Yellow Duckling
 Nature-Based Projects: Twig Crafts with Kids
 Nature-Based Projects: How to Make an Alphabet Twig Book
Leave a Reply